2018 Charity Quilts

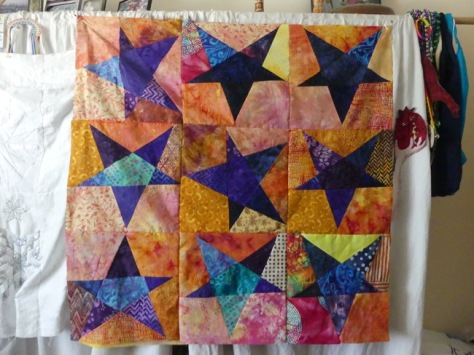
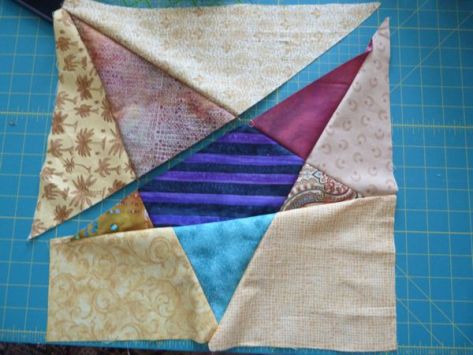
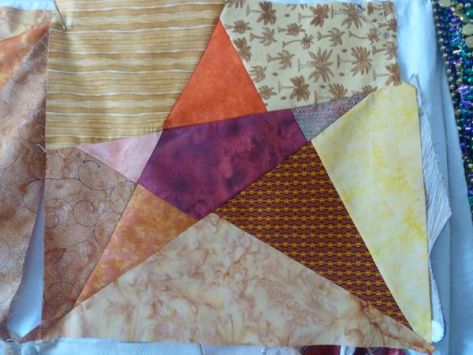
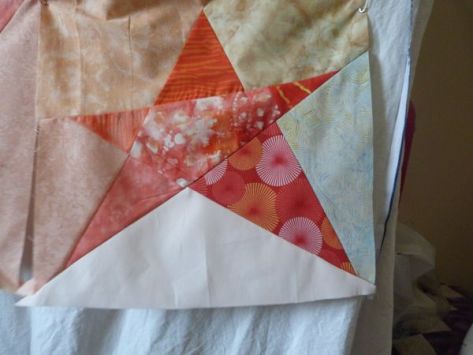
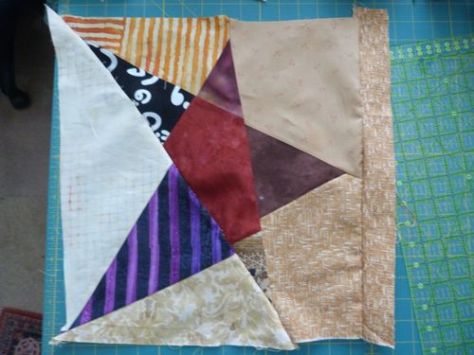
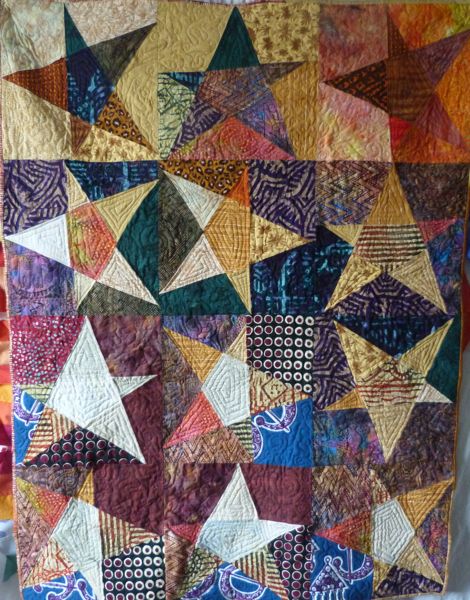
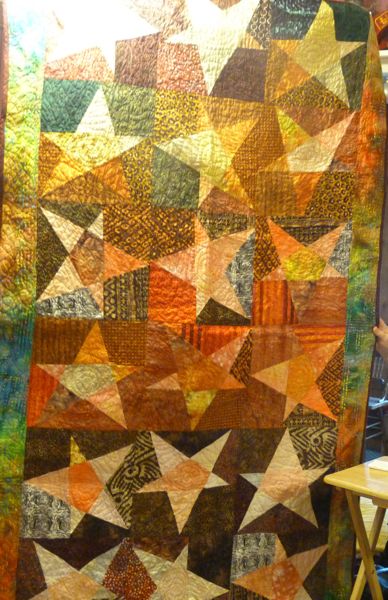
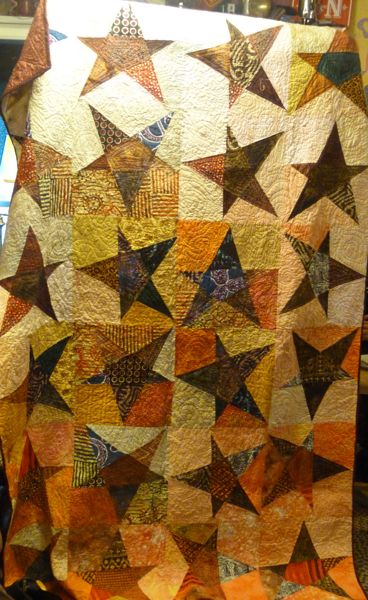
You’ve seen this quilt before in other color ways. I love that it makes the best use of fabric, uses every inch, and goes together relatively quickly. I am not patient with block assembly, but this one is relatively mindless, and gets the job done.

The original star was called a Sloppy Star. I wanted a much larger star, and re-designed it to fill a full 16″ square; when assembled, it comes in about 15″.

P1010785.jpg


P1010788.jpg


P1010790.jpg


P1010791.jpg


The kids love the wild colors. The charity loves the wild colors, and displays a quilt for a while before they pass it along to a recipient 🙂


Some Updated Thoughts on Sloppy Stars

I’ve done a lot of different kinds of quilts, but there are some quilt patterns I am drawn back to doing, maybe doing in new ways, maybe refining. I always love quilts with motion, like Kaleidoscope (click on Kaleidoscope in Categories to see instructions and variations) and another is Sloppy Stars.


It’s the hot, humid steamy season in Pensacola. It’s like winter in Alaska, it’s a good time to stay inside with your sewing machine and fabric except for when you need groceries, or to meet up with friends, or go to church, or even exercise – those are the exceptions. When it is steamy, it’s a great time to quilt.


One reason I love Sloppy Stars is that it makes such economical use of fabrics. You cut fat quarters – actually I cut mine to something like 18 inches square now – and slice, and then seam – no excess, except at the end when you trim as little as you have to on the outside, to make the blocks a uniform size. My goal is 15″ finished squares and now I am pretty good at getting them. My favorite part is picking out the fabrics. I don’t know exactly how they will look in the end, but that is part of the fun – getting fabrics that will jive and thrive, with a little bit of drama 🙂

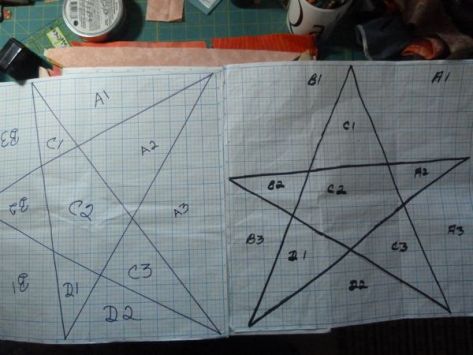
The original instructions for Sloppy Stars are here; these are just refinements I have come up with after doing so many of them. My stars have gotten bigger and bigger; it’s a dramatic cut and I like the efficiency of using a 15″ block. I have two different patterns I use, one is fairly straight, and one is very slanted and wonky. I find I am more drawn to the wonky one, guess I am a wonky one, too. These are drafted on 16″ graph paper I find in books at JoAnne Fabrics.


Because I ran short on freezer paper, I only had enough for two identical copies instead of four. I should’ve gone to the store for freezer paper – cutting 25 layers of fabric was more than my cutter could handle. I got some truly jaggy edges. If you are going for the 50 blocks (25 light 25 dark), do two cuts for each set; 12/13 is enough of a challenge for your rotary cutter. I will never try to cut 25 layers again. Never.

00StarsSameDifferent

I never string piece this block. I have learned from BAD experiences! I keep all the pieces flat; and the two sets (I do one with dark background light stars and one with light background dark stars) are kept separate. I always do one block at a time; each block takes about 12 minutes, I take it slow. It goes together fast, so it pays to go slow so you don’t mix up pieces. Keep away from cats! If a cat jumps up and upsets your pieces, you are out of luck! (Or maybe you will have a highly original quilt 🙂  )


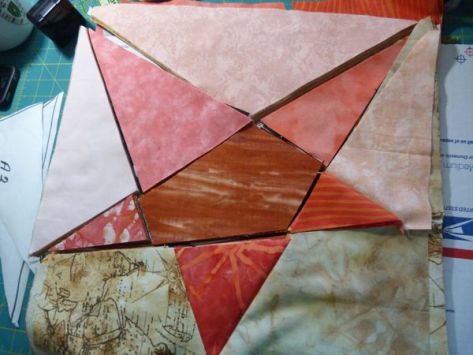
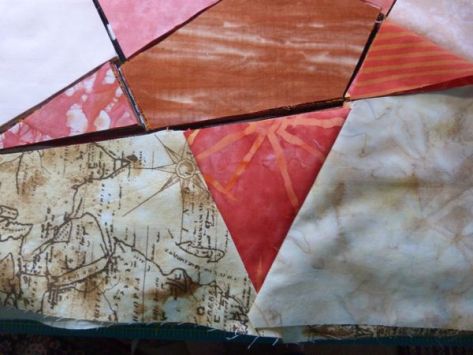
Although the instructions tell you which pieces to put together, I have my own way of doing it (LOL, I no longer follow my own instructions!) and I tend to start with the bottom three pieces in the photo below – star point to the left piece, and then to the right. I then go to the two pieces in the upper right sector, sewing from the straight line to the outer edge.

00StarsAssembly


By taking your time and lining things up (it comes easier with practice) you get the interior lines to match up and end up with a fairly straight line. The fairly straight line makes joining the components easier when you sew the major three blocks together.00StarsFirstSection


Next, I do the central three blocks, and when I finish them, I line up the star point seams and sew the small sector to the larger central sector. With any luck at all, you’ll have a nice join and the appearance of a straight line. Then you sew the last three pieces (upper left sector) together, focusing on making the interior seam the straight seam.


Because of the way these stars are cut, you are only very rarely ever going to get the last piece to line up at both parts of the center star, so focus on lining up the seam so that you get one straight seam with the join giving you a straight line at the upper right.

00StarsAddLastSection


Things don’t always work out. Don’t worry. Wonky blocks are part of the charm of this technique. Two straight lines is great; three straight lines are awesome but all in all – are you having fun? No one is going to nit-pick this quilt, there are too many distractions! (Below is a wonky block I will truly use, but I wanted to show you that no matter how hard I try to be perfect, I am a miserable failure who sometimes doesn’t even manage two straight lines. I am a miserable failure who is having a lot of fun putting these stars together, though 🙂

00Stars2Straight2WonkyLines


This star comes pretty close to the goal – Four pretty good straight lines, almost five. That fifth just isn’t ever going to happen.

00Star3StraightLines


But, even though they are all cut the same way, and I do my best to stitch them the same way, for no apparent reason, now and then one star goes wild. The truth is, no one but you will ever know, but this is why I save my leftover strips after I have trimmed the stars down before slicing.

00WonkyStarRepair


I even took this one apart and restitched it, but no matter what I did, it was dangerously out of whack. I added a one inch strip to the wackiest side, and was able to even everything up within reason, but this will never be a star that gives me satisfaction. It may, however, be one of those blocks that gives a quilt “character.” (When the blocks are sewn together, that addition will disappear . . . you just don’t see it in the wildness of all the diferent patterns and shapes.)


There are a lot of different ways to quilt these stars. In the African series, I used more angular quilting, and I liked it, it looked good with the African fabrics. In some of these quilts, I use a spiral out of the center block, and then elongated squiggles from the central star piece radiating out to the star tips. The background I stipple.

45 Minute Quilt and Machine Quilting Inspiration

It’s not that I haven’t been quilting, but November and December I spent my quilting time babysitting my sweet adorable endlessly fascinating grand-daughter, and now I am scrambling to catch up.

I’ve got two quilts promised next week for young men aging out of the foster care system, and I am down to the wire on the last one. I saw a video on making a quilt in 45 minutes. No, it is not possible, but I was intrigued by the technique. You take – in her case, I believe 33 width-of-fabric strips, connect them with diagonal joins (the kind you make for binding), then you start sewing by taking the end and stitching it to the beginning, lengthwise.

Strips

00StripStrips

That first seam is a doozy. You cut the fold when you reach the end. The second seam, when you take the end and start stitching it to the beginning, lengthwise, is only half as long :-). The third seam is only half the length of the second. In total, you sew like five long seams, because at the end of every seam, you cut the fold. You get 16 + 16 and you have a 32″ quilt wide, and maybe 47 inches long. I can’t tell you exactly, because of course, I didn’t do it the way she said. I threw in lots of scrap 2.5 inches here and there for visual interest, and then did a second one using 66 strips (around 1600 linear inches in the first strip).

00FirstLongStripCompleted

SetOfFourCompleted

00SetOfEightCompleted

00SetOfSixteen

00CuttingEndOfStrips

It is a fun and easy way to use up scraps, and the result doesn’t look like you just threw something together, it has visual interest. I shared it with my quilting buddies, and they have run away with it. We discovered that if you cut the strips 3.5 inches for a 3 inch strip, you end up with a 48″ wide quilt, which is closer to what we need for single bed sized quilts.

The problem – how to quilt. It stymied me for a while, and then I went to my notebook, where from time to time I draw designs I have seen that I want to think about using. There I found the perfect pattern for the African fabric quilt I am trying to finish:

00QuiltingIdeas

You see this everywhere in Africa. For some reason I think it is called squash blossom, but I do not know why I think that. It takes me a little longer, but I love the repetition, and I am nearing the end:

00QuildIdeaApplication

Here are the quilts I have just about finished:

00AfricaAgingOut

00ConfederateAgingOut

And this is my experiment with 1600+ inches; it turns out vertical because I made it 64″ wide. When you are working with 2 1/2 inch strips, your finished strip piece will always be either 32 inches or 64 inches, adding strips just varies the other dimension. To get anything besides 32 or 64 inches, you have to vary the strip width.
00ExperimentVertical

I realize this is not very clear.

This is actually called the Jelly Roll Race, by Jenny Doan. Here is the Jenny Doan video I watched.

Stars of Sossusvlei

I am not doing such a hot job of record-keeping here; I finish something and it is out the door before I enter it. Oh aarrgh.

I did another Sloppy Stars demo several months ago with African fabrics (I still have a lot in my stash, so you will probably see yet more . . . ) and had enough for two bed-sized quilts for one of our bee projects . . . I still have one more chance to photograph them before they disappear, but they are not with me.

Meanwhile, with the blocks I had left, I did a wall hanging quilt for us. I don’t do a lot of those, but this one contains some fabric I love and bought thirty-something years ago in Tunisia. I don’t even know if Tunisia even produces fabrics any more.

This is the hanging:

00NamibianDesertStars

Sossusvlei is an area in the Namibian desert, where the ambient light is non-existent and you can see the rings on Saturn, the red-ness of Mars, and a million stars you never even knew were there. The sight is awe-inspiring and breathtaking. We were at the CCAfrica Lodge, now called And Beyond; it was so much fun. One of my best memories was riding ATV’s to the top of a mountainous rust-red sand dune for sundowners. 🙂

Update: Our bee has a project every year to benefit a local charity. This year we made quilts for one of the Waterfront Mission recovery houses. These are two more of the Sossussvlei quilts made for them. Actually, these are the original quilts and the one I am keeping for us is made with left over blocks from these. One of these is made with “light” background and one with “dark” background, all things being relative 🙂

00LtDesertStars

00DkDesertStars

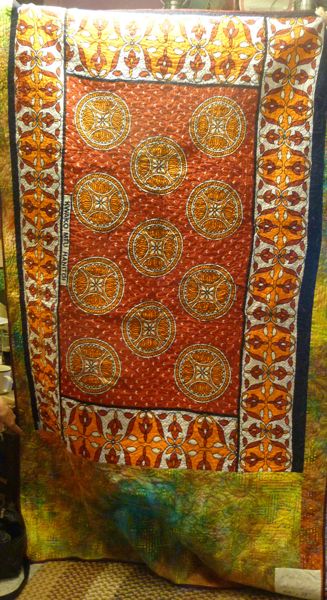
This is my backing on the dark Sossussvlei Stars quilt”

00BackDkAfricaStars

African Pathways Quilt

I know it looks like I haven’t been producing for a while and to some extent, it is true. I am working on a mystery quilt, I am working on a serious hand applique border to a pineapple quilt, and I have finished a few little projects but I forgot to photograph them, and once they are gone, they are gone, sometimes I don’t even remember I did them!

This one I just finished, and it was a labor of love.

In June of last year, a dream came true – we were able to take our son and our daughter-in-law on safari with us in Zambia. We stayed in the Robin Pope Camps – Tena Tena, Nsefu and Nkwali – and a second dream came true – at Nkwali, we stayed in the famed Robin’s House, which was pure heaven for a party of four who would then be going in separate direction. A third dream came true – they loved the trip as we hoped they would.

I had intended to make this quilt all along – for our son and his wife – and I started it, and had a lot of fun with it. I’ve been collecting fabrics forever with an African theme, and then a good friend had spent several years in Africa and I begged for some scraps from her, which she gladly and generously gave me.

Then my husband had a trip scheduled to the states unexpectedly, and I have an opportunity to get the quilt sent back with him. It hurried the process a little. I had it all put together and machine quilted, but I wanted to quilt some animal tracks on the paths. More on that later.

I don’t have a way to hang the quilt properly to get a good full scale photo – the quilt finished size is 84″ x 84″ – so I put it on the floor, climbed a ladder, shot the quilt and then tried to shop out all the background, so that is why it all looks so funky.
00african-pathways

My husband says he loves this one almost as much as I Left My Heart in Africa.

I started with the Elephant tracks:
00apelephant

The elephant tracks took a lot longer than I had thought they would. I had done them on the entire path. Time is growing short. I did one set of lion prints:

00aplion

And then, nearby, I did one set of impala tracks:

00apimpala

That is going to have to do. I told my husband, whose tracking book I had used to do the animal prints, that the hungry lion was waiting in the bush and ate the impala, and that is why there are so few lion and impala prints. :-0

Here is the label on the back (you can see the backing fabrics on the entry for March 2, 2009)

00qba3label

The rest of this entry is purely for people who love fabrics. You have been warned. 🙂

There is one fabric in this quilt that is almost thirty years old. It is the remainder of three meters of fabric I bought when we lived in Tunisia, lo, these many many many years ago. I loved it then, and I love it now. It has been in all three of the Africa quilts, in many other quilts made for family members and close friends, and now I am down to mere scraps, fortunately, enough to include in this quilt, because Tunisia, although North African, is truly also Africa. The pattern featured Bedouin jewelry patterns, the hand of Fatima, crescents, special pins to hold the sefsari together at the shoulders – and it is in turquoise and purple (be still my heart!) with black and white accentuation. Here it is featured in the center, and the second scrap is in the upper right quadrant of the quilt:

00qba3historic1

00qba3historic2

I was really really lucky to have a good friend who had also lived in Africa – she shared some scraps with me. There are people who might think some of them are ugly – an artist friend of mine told me once long ago “there are no ugly fabrics, only people lacking in imagination.” She also told me “the eye will blend!” two mantras I repeat to myself when I start obsessing over just the right fabric or just the right placement. She was right. You can cut chunks out of fabrics, any fabric, and make it work. There are some really really fun fabrics in this quilt:

00uf1
Don’t you just love it? This one was from a big orange, very orange celebration of Gabon’s independence!

00apc1
This fabric was from Senegal; don’t you love the digitalized palm tree?

I will admit, it was a challenge for me working in browns and yellows, not my favorite palette at all, but I find when I force myself out of my comfort zone, I grow, and learn to see thing in new ways. Some of the colors here I really did not like, but my artist friend was right – the eye will blend. Africa is a country of enormous diversity, and the quilt incorporates some wildly disparate colors, prints and values.
00afuf2

00apf2

00apf3

00apuf1

00apuf3

00apuf4

00uf2

00uf3

African Pathways is made with two simple blocks – a hatchet block, sometimes also called an anvil, and a 4 patch. In this quilt, all blocks were 4″ finished. The hatchet block is made by stitching a 2 1/2 incl square diagonally across opposite corners (diagonally) and cutting off the excess, leaving a 1/4 inch seam, flipping the top down and ironing, and a four patch is made up of 4 smaller blocks, cut 2.5 inches.

I have a friend who is a beginning quilter. When I showed her how the quilt was made, she said “Oh! I could do that!” It was an Obama moment – “Yes. You can!” 🙂 This quilt pattern is a real confidence builder, and a great teaching quilt.

There are many, many ways these flexible blocks can be put together. Other quilts using these blocks are here:

Hugs and Kisses
Reciprocals
Black and White and Blood all Over

Quick Quilts for Charity (Instructions for making two hatchet block quilts)

Here is my computer plan for the quilt; having the grid all mapped out helped me to plan the pathways and to know how many of each fabric to cut for pathways, how many 2 1/2 inch squares to cut for the 4-patches, and how to place them. The quilt is built in quadrants and then sewn together.

africanpathwaysgrid

Happy Anniversary, lovebirds. 🙂

Sloppy Stars

These are the quilts demo’d at the Q8Quilters Hands-On meeting today:

Sloppy Stars

January 2008

00dancing-stars.jpg

These stars ARE sloppy, and the original design, in which the star blocks were something like 9 x 14 were conceived by Evelyn Sloppy. I wanted a more square star, so I re-drafted it  and . . . it worked!

Although your pattern will be cut 16.25 inches (DO NOT FORGET TO ADD .25 INCH TO THE OUTSIDE BORDER OR YOU WILL LOSE STAR TIPS!) your finished block will measure approximately 13”.

sloppystardiagram.jpg

Make yourself a master copy, a copy you swear you will never cut. When you want to make this quilt, make copies on freezer paper from your master copy.

If you want alternating backgrounds (some stars light on dark, some stars dark on light) then you will need:

13 light fat quarters

12 dark fat quarters.

1.  Starch, iron and stack all the lights together, and starch, iron and stack all the darks together.

2.  Make two copies of the master chart on freezer paper. Iron one on to the top of the lights stack, and iron one onto the top fat quarter from the dark stack. Be sure to iron the freezer paper onto one side of the fat quarters so there will be plenty of leftover fabric for fixing up blocks, if you need it.

3. Put a fresh blade in your rotary cutter.

4.  Holding your piles steady, make cuts in the order shown.

5.  When both piles are cut, first on the light stack, we do the background pieces first:

start with A1 – take the top piece and put it on the bottom of the A1 pile.

Go to B1, take the top two pieces and put them at the bottom of the pile of B1’s.

B3, take the top three pieces.

D1, take the top four pieces.

A3 – do nothing! Now do the same process on the dark stack.

Now do the same with the star pieces in each pile:

C1 – take the top piece and put it on the bottom

B2- take the top 2 pieces

D2 – take the top 3 pieces

C3 – take the top 4 pieces

A2 – take the top five pieces

C2 – do nothing

Now take all the light background pieces and switch them to the dark star stack. Take the dark background pieces and switch them to the light star stack.

6.  Piecing

Leave everything stacked.

Do not string piece;  the stars get confused. I suggest you stitch all the pieces to each star at the same time. It takes a little longer, but it is worth it.

Stitch A3 to A2, and then stitch A1 to A2.

Stitch B2 to B3, then stitch B1 to B2.

Stitch C1 to C2, then stitch C3 to C2

Stitch D1 to D2.

Stitch the D Sections to the C section (trim the edges which will join so that they are even)

Your pieces will not have lined up exactly. With each star, trim the inner joining lines. Don’t worry about the outside, we will trim these blocks up when the blocks are finished.

As you stitch the sections together, the intersections will not be where they were on the pattern. Don’t worry. They don’t have to. Your stars will all work out. These are SLOPPY stars.

Stitch the A section to the CD section.

Stitch the ACD section to the B section.

I will tell you honestly at this point, my stars looked AWFUL – lots of wobbles because of the bias edges.

Press your stars, use a little starch, and then measure the smallest star. Trim your blocks to that size. Alternatively, if your smallest star is too small, you can use some of that leftover fabric to put a small border where you need it. Honestly, we do this all the time.

Arrange the blocks, 5 x 5, and sew them together. Put on a border, if you wish. The quilt, without a border, will be about 55 inches  – but this is not a precise technique, and your results may be slightly different.

Quilting will take care of the wobbles.

ALTERNATE:

I did two quilts at the same time, because I wanted an all dark background and an all light background.

You need:

25 dark fat quarters

25 light fat quarters

When all your blocks are completed, use all the ones with dark background for one quilt and all the ones with light background for the second quilt. Keep one and give the other as a gift!

I did these in Christmas colors, but I have also seen them done in blues and whites, reds and whites, and once, fantastically, in rainbow colors.

Map Quilt Class

Map Quilts

28 January 2008


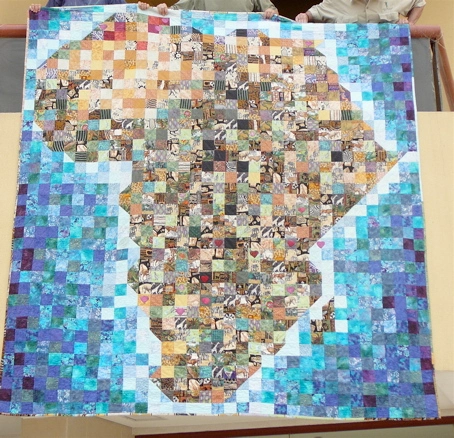
These are all the map quilts in one place, with class instructions on how to make them: 
 

00africaquilt.jpg 

I left my Heart in Africa 

 00md.jpg

 Moroccan Dreams


00turkishdelight.jpg 

Turkish Delight 


00kafricatop.jpg 

African Kaleidescops 


Lawrence of Kuwait

Lawrence of Kuwait

1.  Start with a graph

Find the country you want to map, or state, or entire continent, and draw it onto your graph paper. It may change several times – that’s OK. You have time. Figure out what colors you want to use, and why. Identify any motifs you may want to use, appliqué, pieced or quilted.  Figure out what you are going to do with the area that is NOT part of your focus country!


2.  Gathering the Fabric

This actually takes the most time. You need many many different blues, for example, if you will have sea, shading from the very lightest to deeper purple, if it goes deep. You may want desert tones, or greens. You may want fabric from the country you are making, or you may want to appliqué something onto a square, and to identify where you will want it to go.


One really fun part is to ask your friends. You don’t need even a fat quarter, just scraps big enough for a couple squares. The greater the variety you acquire, the greater your flexibility in placement. As an example, I probably use 50 different “sea colors” ranging from the lightest blues to the deepest purples. My friends gave me Egypt fabrics, and Sudanese fabrics. 


These first two steps can take months, or even years. You will come up with all kinds of amazing ideas. Keep your plans for your map quilt in one place, and write down your ideas when you think of them, so you don’t forget them.


3.  Distributing the colors

I usually figure out where I want different colors – all the golds to almost white in the desert, for example, maybe this quadrant will be red. In the Africa quilt, I used pure black for some places where terrible things were happening. It helps the balance of the quilt to have colors grouped together, and that takes some planning. Also, now is the time to make any specialty blocks you may want to include.


Take a look at your fabrics, and at your graph. Figure out how big you want the quilt to be. In the first Africa quilt, for example, the smallest I could cut the giraffe fabric and still have it be effective was 3.5”. That one fabric, and my desire to use it, drove the entire quilt to its current huge size.


Even if you have been cutting fabrics all along, when you finally get to the point where you are ready to start – you will have to start with cutting. To have enough of every color, you just cut a lot. Even so, there are times when you will have to get up from sewing to cut some more.


I don’t go to a lot of effort to be accurate about terrain, but if you want to include a lake, or mountains, or something particular to that region, you can either use fabrics which show what you wish to emphasize, or you can create your own lake, or desert, or fields of flowers – it’s your quilt, you get to be the boss! 


Mountains: You can make a large mountain by making it four squares big, white mountain with blue sky , for example, or black mountain with blue or white sky. As long as you have planned ahead, anything is doable. Smaller mountains can be exactly the same size as the other blocks. It’s just nice to have a little variety. 


4.  Execution:

Break your quilt into doable sections. You might use quadrants, and each quadrant usually has a dominant color. Cookie trays can keep the squares in some kind of graduated order. Always have the graph on the wall, so you can check it frequently, and use a project wall, where you can hang the completed sections and check them as you go along. 


You might do two rows, sew them together, and then sew them directly to the section where they belong. It might seem fiddly, but it helps you keep track of where you are on the graph, and it helps you see where you might want to add more deep / light colors, etc. It is also just a lot of fun to watch it grow.


As you go along, check off each row as you complete it. Again, it may seem fiddly, but it is easy to get lost and confused, especially when you are working on a section of coastline, and you need to get the half-square triangles going the right ways! 


5.  Quilting and Embellishing

It has been so much fun, just watching all those colors come together and blend into a fabric collage of a country. Now is time when you can make it even more special.


Make the sandwich. 


Do a quarter inch outline of the continent/country you are working on, very first thing. It helps keep everything stable, and it gives your focus some definition.


If there are particular quilting motifs you want to use – a mariner’s compass in the sea, for example, or camels crossing the desert, or a hand of Fatima, or a teapot – you’ve been gathering them all together, and now you get to have the fun of putting them in.


You might want to do waves, and spirals, and fish in the sea. You might have your own ideas to make this quilt uniquely your own creation, and now is the time to explore them. These map quilts are not serious quilts, they are supposed to be fun. 🙂


6.  Surprise.

In every map quilt I do (and in many of the others) I put a surprise. In the Morocco Dreams quilt, I put a camel in the desert, so big you couldn’t see him unless you stood about ten feet away. He was in slightly lighter colors than the rest of the desert. I also outlined him in hand quilting. 


You might want to machine quilt in the name of the person for whom you are making the quilt, the date and the place. You  might want to machine embroider your own name in the quilt, in an inconspicuous spot, where some quilt-heritage researcher may someday find it and rejoice! Most of all, this is where you can have fun with embellishing the map so that it tells something about why you chose this country, something about how you feel about this subject. Here is where you can use charms and beads and crystals to highlight special and unique qualities.


Photos and more instructions at :  worldquilter.wordpress.com.  Click on map quilts under categories, over on the right hand side.

French Sunshine

Wooo Hoooooo! Sometimes life just makes itself easy.

Last summer, just after I had started this blog, I showed my good friend from college days. We met in French class at a huge university, and ended up having three classes together – the only person I kept having the same classes with out of thousands.

By the grace of God, we have been friends ever since.

As she looked through quilts I had done, she came to the Stack N’ Whacks and said “WOW!”

I already knew I would be teaching a Stack N’ Whack class this year.

The following week, I came across the perfect fabric, and bought the rest of the bolt. How sweet it is. There was just exactly enough.

She lives where winters are long and dreary, and I wanted her to have warmth and sunshine in her quilt. I chose hot, wild colors to bring some tropical paradise into her long, wet winters. I am very happy with the result!

00frenchsunshine.jpg

Details:

00fs2.jpg

00fs3.jpg

00fs4.jpg

The quilt has flaws – just as I do. She will never notice. She will just think it is a great quilt. I thank God to be blessed with a friend like her.

Sweetheart Quilt

I know this pattern originally came from one of the Quilting magazines. As I never do anything the way I am told, I changed the block size and created my own quilting patterns to accomodate my growing machine quilting skills. This one his half hand quilted and half machine quilted.

I made it for my son, for the girl he would one day marry. Thanks be to God, he chose a wonderful woman, and I was delighted to send him the quilt to give to her. Then, I forgot it until I went to photograph the Seminole quilt, and found this quilt next to that! I wonder how many other quilts are out there that I can’t even remember?

When I teach this quilt, I show the class, and then fold it and ask what color it is. When they say “red and white” we look at the quilt again, to see the huge variety of colors that qualify as “red” in this quilt, all the way from deep purples to orang-y oranges, and the entire range of prints and solids in between. Scrap quilts are fun that way – they can fool the eye. And there is a real art to making sure the colors blend, and that no one color draws the eye and attracts too much attention to itself.

00sweetheartquilt.jpg

UPDATE: After all these years, I just spent like five minutes to draw it out and another five to upload to my computer.

To keep it simple, for the setting blocks (corner, sides) I just use the whole blocks, don’t worry about the edges until it’s time to trim, and then trim the unnecessary fabric off with your rotary cutter.